Golden crispy air fryer fries served in a wooden bowl, showing the healthy cooking results achievable with an air fryer

Tag: Cooking Times

cooking times can be reduced when cooking in an air fryer, compared to a traditional fan assisted electric oven.

  • Air fryer cooking time – tips

    Air fryer cooking time – tips

    You’ve probably followed an air fryer recipe to the letter, set the timer exactly as instructed, and ended up with food that’s either burnt to a crisp or still raw in the middle. I know I have. Last week I found myself making air fryer salmon fillets according to a trusted recipe, only to pull them out overcooked and dry while my roommate’s identical batch (same time, same temperature) came out perfectly medium-rare.

    Misunderstandings

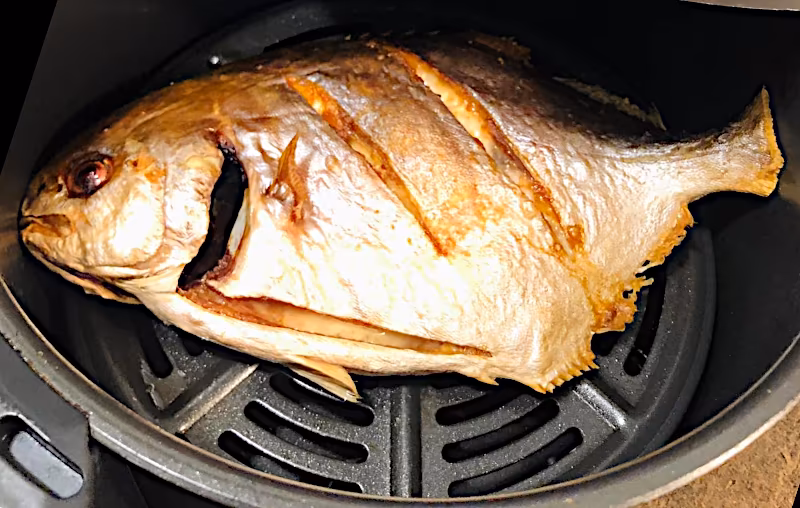
    I remember the moment clearly: I was trying to recreate that restaurant-quality air fryer salmon I’d seen online, complete with crispy skin and tender, flaky interior. As I cut into my overdone fillet, watching the dry, chalky flakes separate, I suddenly wondered if I was missing something fundamental about how air fryers actually work. Was the recipe wrong, or was I misunderstanding something about my specific appliance?

    Temperature

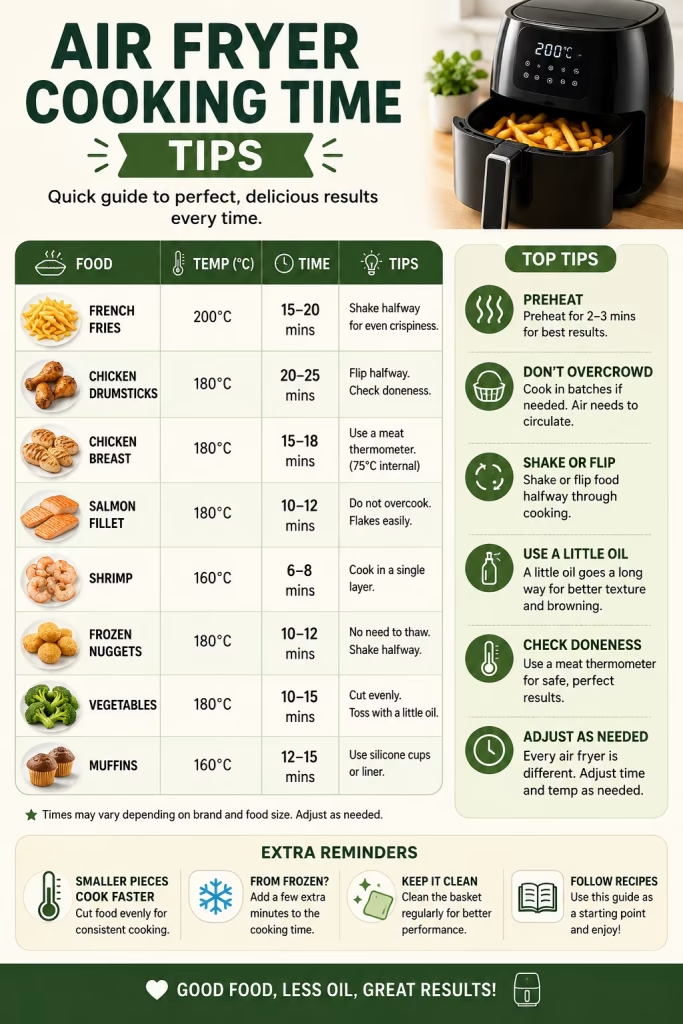
    Here’s what I discovered after testing multiple batches across different air fryer models: every brand of air fryer is different when it comes to temperature and airflow, which means recipe times are starting points, not gospel. The key isn’t blindly following instructions—it’s learning to read your food and adjust based on what you’re seeing, not just what the timer says.

    Design

    What actually happens is fascinating from an appliance engineering perspective. Air fryers don’t just heat air—they create specific airflow patterns through the combination of fan speed, heating element placement, and basket design. Two air fryers set to the same temperature can have vastly different heat transfer rates because of these design differences. One might blast hot air directly onto your food while another creates a more gentle, circulating flow—leading to significant differences in cooking speed even at identical temperature settings.

    Heating Protocol

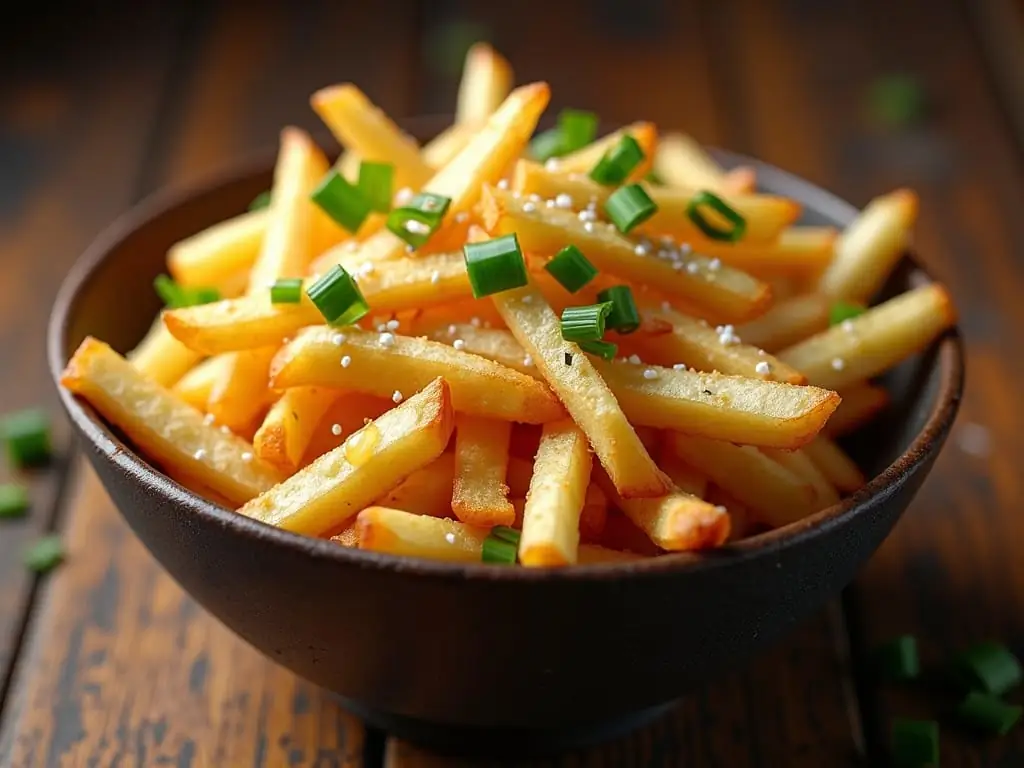
    My coworker insisted that you just needed to “preheat longer” to compensate for model differences, citing his experience with a particular brand. But when we tested the same recipe (frozen French fries) across three different air fryers at their respective recommended preheat times, the results were all over the map. One batch came out perfectly crisp, another was soggy in the middle, and the third was burnt on the edges but raw in the centre—all despite following the same preheat protocol.

    Thermometer

    The problem isn’t what you think—it’s not about finding the one “true” cooking time for your air fryer. It’s about understanding that visual and textural cues are infinitely more reliable than clock-watching. That golden-brown colour you’re aiming for? It’s a better indicator than any timer. The internal temperature was measured with a quick-read thermometer. More trustworthy than guessing based on elapsed minutes.

    Flip Time

    Let’s talk about the “turn over” or flip time for a minute. I know it seems like a small detail, but checking your food at the halfway point is arguably the most important step in air fryer cooking. This isn’t just about preventing sticking—it’s your primary opportunity to assess progress and make course corrections before it’s too late.

    Chicken Thighs

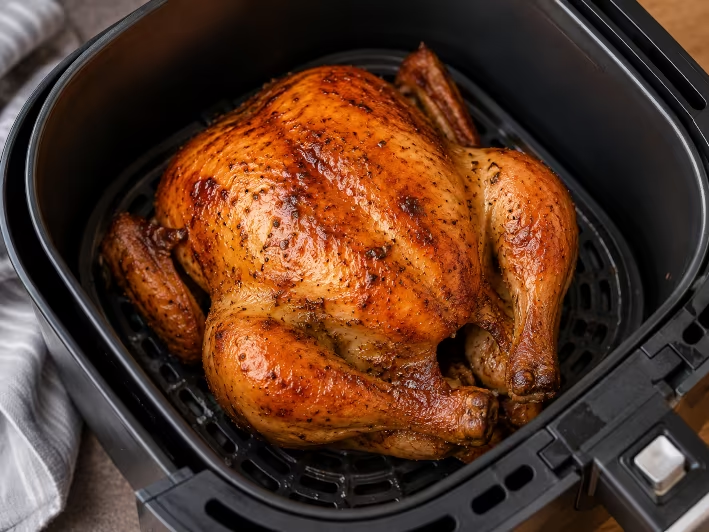
    I learned this lesson the hard way after ignoring the flip time on a batch of air fryer chicken thighs. I set the timer for 25 minutes at 200°C, walked away to do other chores, and came back to find the bottoms beautifully crisped while the tops were pale and steamed-looking. When I flipped them at that point, I could see exactly how much more time the pale side needed—about 8 minutes instead of the full 12 I would have added if I’d waited until the end.

    Cooking time

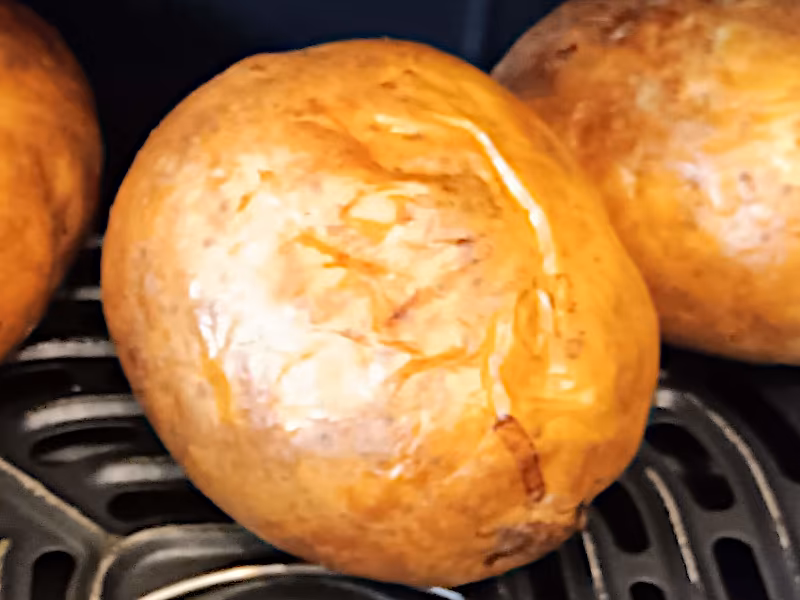
    There’s also the carrying over factor to consider. Food continues to cook from residual heat even after you remove it from the air fryer, especially with dense items like meat or potatoes. I’ve pulled out what looked like slightly underdone pork tenderloin only to find it perfect after 5 minutes of resting, while other times I’ve left food in “just a minute longer” and ended up with overcooked results.

    Grilling

    But here’s the thing I still think about: that moment when I realised I’d been approaching air fryer timing all wrong. I’d been treating it like oven baking, where you set it and forget it, when it’s actually more like grilling—requiring active attention and constant adjustment. The air fryer isn’t a set-it-and-forget-it appliance; it’s a precision tool that rewards engagement.

    Thank yourself

    Your future self will thank you for treating recipe times as guidelines rather than rules. Not just because it prevents culinary disasters (though that’s a huge benefit), but because you’ll develop a deeper intuition for how your specific air fryer behaves with different foods. Next time you’re tempted to walk away and “let it cook,” remember: the best air fryer cooks aren’t the ones who follow timers religiously—they’re the ones who check, adjust, and trust their eyes more than their clocks.

    Setting the timer

    I used to think that if a recipe said “cook for 15 minutes at 200°C,” I should set the timer and return exactly when it dinged. This belief came from years of following conventional oven recipes where timing is relatively consistent across appliances. It wasn’t until I started using multiple air fryer models that I realised this transfer of knowledge was setting me up for frustration.

    Salmon

    The first time I tried making air fryer salmon according to a precise recipe (12 minutes at 200°C), I was preparing a quick weeknight dinner for myself. I had patted the fillets dry, seasoned them properly, and set up everything according to the instructions. I set the timer, walked away to chop vegetables, and returned when it alarmingly beeped. What emerged disappointed me greatly—the salmon was overcooked, with dry, chalky flakes and zero translucency in the centre.

    Appliance Inconsistency

    Most recipes give specific time and temperature combinations without acknowledging the significant variability between air fryer models, leaving countless home cooks blaming themselves for “doing it wrong” when the real issue is appliance inconsistency. This vagueness causes needless waste and frustration as people repeatedly overcook or undercook food while following instructions to the letter.

    Test Kitchen

    What I discovered through systematic testing is that successful air fryer cooking relies on three key adjustments: visual cues (colour and texture), temperature verification (when possible), and progressive time adjustment based on observation. Instead of thinking in fixed minutes, we’re working with ranges and checkpoints: start with the recipe time as a guideline, check at the halfway point, then adjust in 2-3 minute increments based on what you see.

    Checkpoint

    Here’s a surprising detail I wish I had known sooner: the ideal “checkpoint” time varies significantly by food type and thickness. For thin items like fish fillets or vegetables, check at 1/3 of the estimated time. For thicker items like chicken breasts or pork chops, check at the halfway point. For very dense items like whole potatoes or meatloaf, you might need to check at 1/4 and 1/2 intervals to make fine adjustments.

    The problem isn’t what you think—it’s not about achieving perfectly uniform doneness from edge to centre. It’s about understanding that some variation is natural and even desirable in air frying, where the exterior crispness and interior tenderness create a pleasing textural contrast. What matters more is avoiding the extremes—burnt exteriors with raw interiors or uniformly grey, overcooked results.

    Limitations

    Let’s get real about limitations: this attentive approach isn’t for everyone or every situation. If you’re cooking for a large family and need to prepare multiple batches back-to-back, the constant checking might feel too tedious. Also, if you’re using accessories like racks or skewers that block visibility or make flipping difficult, you might need to rely more on time estimates and internal temperature checks.

    Food Safety

    There’s also the matter of food safety to consider. While visual cues work well for many items, with proteins like chicken or pork, internal temperature is the ultimate arbiter of doneness and safety. No amount of golden-brown colour guarantees that the chicken has reached a safe 75°C/165°F internal temperature.

    Sunday Afternoon

    But here’s the thing I still think about: that Sunday afternoon when I served perfectly cooked air fryer salmon to my sceptical roommate. I had started with the recipe’s 12-minute suggestion but checked at the 4-minute mark (1/3 time for thin fish), flipped at 6 minutes, and pulled them out at 10 minutes when the flesh was opaque but still moist-looking and flaked easily with a fork. When they took that first bite—the moist, tender interior giving way to the crispy, seasoned exterior—they admitted they couldn’t believe it was made in an air fryer and asked for my “secret.”

    Engagement

    The real beauty of flexible timing in air frying lies in how it transforms our relationship with this appliance. By accepting that perfection requires engagement rather than blind trust in timers, we move from frustrated recipe-followers to confident, adaptive cooks who understand their tools. It’s not about lowering standards—it’s about applying them where they actually matter: in the food on your plate, not the numbers on your display.

    Pause

    Next time you’re standing in front of your air fryer with a timer set, pause for a moment. Ask yourself whether you’re willing to walk away and trust the clock or if you’d rather check, adjust, and engage with the process. Then trust your eyes more than your timer: look for that golden-brown colour, assess the texture, and remember that you can always add time but you can never take it away.

    Guidelines

    Your future self will thank you for treating recipe times as guidelines rather than rules. Not just because it prevents culinary disasters (though that’s a huge benefit), but because you’ll develop a deeper intuition for how your specific air fryer behaves with different foods. Next time you’re tempted to walk away and “let it cook,” remember: the best air fryer cooks aren’t the ones who follow timers religiously—they’re the ones who check, adjust, and trust their eyes and sense of smell more than their clocks.

    air-fryer-cooking-time-tips-handy-guide infographic listing cooking times, temperatures and tips for popular food
  • How to Cook Pompano Fish in an Air Fryer

    How to Cook Pompano Fish in an Air Fryer

    How to Cook Pompano Fish in an Air Fryer to Give Crispy Skin and Flaky Flesh in 15 Minutes

    Learn the perfect time and temperature to air fry pompano fish for a healthy, delicious meal with crispy skin and tender, flaky flesh. Includes seasoning tips, preparation tricks, and serving suggestions.

    TL;DR

    • Cook pompano fish at 200°C (400°F) for 12-15 minutes total, flipping halfway
    • Pat dry and score the skin for maximum crispiness
    • No oil needed if using a non-stick basket, or use 1 tsp oil for extra crispiness
    • Internal temperature should reach 63°C (145°F) for food safety
    • Rest for 3 minutes after cooking to retain juices
    • Perfect for healthy weeknight dinners – ready in under 20 minutes
    Key Cooking & Nutrition Statistics (Air Fryer Method Overview)
    Metric Value Source
    Cooking time 12–15 minutes Hungry Lankan testing
    Cooking temperature 200°C (400°F) Multiple recipe consensus
    Oil reduction vs pan-frying ~90% less oil AirFryFoods analysis
    Safe internal temperature 63°C (145°F) FDA guidelines
    Protein content (per 100g) 20g USDA Fish Database
    Omega-3 fatty acids 0.5g per serving Nutritional studies

    What You Need Before Starting

    • Fresh pompano fish (whole, cleaned, or fillets)
    • Air fryer basket or tray
    • Paper towels
    • Sharp knife (for scoring)
    • Tongs or a spatula
    • Lemon wedges and fresh herbs (for serving)
    • Meat thermometer (highly recommended)

    Step 1 – Prepare the Pompano

    What to Do

    Rinse the pompano under cold water and pat thoroughly dry with paper towels. If using whole fish, make 3 diagonal slashes (about 1cm deep) on each side. If using fillets, score the skin in a crosshatch pattern. Season inside and out with salt, pepper, and, optionally, garlic powder or paprika.

    Why This Matters

    Drying the surface is crucial for crispy skin – moisture creates steam, which prevents browning. The slashes allow heat to penetrate evenly and help the seasoning reach the flesh. Proper seasoning enhances the fish’s natural sweet flavour.

    Common Mistakes to Avoid

    • Skipping the dry step results in steamed, soggy skin
    • Over-seasoning – Pompano has a delicate flavour that can be overwhelmed
    • Using frozen fish without proper thawing leads to uneven cooking

    Step 2 – Preheat the Air Fryer

    What to Do

    Set your air fryer to 200°C (400°F) and preheat for 4 minutes. This ensures immediate searing when the fish hits the basket.

    Why This Matters

    Preheating creates an instant sear that locks in moisture and begins crisping the skin immediately, preventing the fish from steaming in its own juices.

    Common Mistakes to Avoid

    • Skipping preheat leads to longer cooking time and less crispy skin
    • Overcrowding the basket – cook one piece at a time for best results
    • Using aerosol cooking sprays can damage the air fryer’s non-stick coating

    Step 3 – Cook and Flip

    What to Do

    Place prepared pompano in the preheated air fryer basket. If concerned about sticking, lightly brush the basket with 1 tsp oil. Cook for 6-7 minutes, then carefully flip using tongs. Cook for another 6-7 minutes until the skin is golden brown and crispy.

    Why This Matters

    Flipping ensures both sides cook evenly and the skin crisps properly. The total 12-15 minute cook time renders fat under the skin while keeping the flesh moist and flaky.

    Common Mistakes to Avoid

    • Flipping too early – skin may stick and tear
    • Cooking beyond 18 minutes total can result in dry, overcooked fish
    • Flipping too aggressively – use gentle pressure with wide tongs or a spatula

    Step 4 – Check Temperature and Rest

    What to Do

    Insert a meat thermometer into the thickest part of the fish (avoiding bone). It should read at least 63°C (145°F). If needed, cook in 2-minute increments. Remove pompano and rest on a plate for 3 minutes before serving.

    Why This Matters

    Resting allows the juices to redistribute throughout the flesh, ensuring each bite is moist and flavorful. Skipping this step can lead to dry fish as juices run out when cutting.

    Common Mistakes to Avoid

    • Cutting into fish immediately releases precious juices
    • Relying solely on appearance – always verify with a thermometer for safety
    • Resting too long – the fish continues to cook and can become overdone

    Frequently Asked Questions

    Do I need to add oil when air frying pompano?

    Not necessarily – pompano contains natural oils that help crisp the skin. However, a light brushing of oil (1 tsp) can enhance crispiness, especially if your basket isn’t perfectly non-stick.

    Can I use frozen pompano?

    Yes, but thaw completely in the refrigerator first and pat extra dry. Add 3-4 minutes to the total cooking time and check the internal temperature carefully.

    How do I know when the pompano is done?

    The flesh should be opaque and flake easily with a fork. The skin should be golden brown and crispy. Most reliably, use a thermometer – 63°C (145°F) at the thickest point.

    What’s the best way to season pompano for air frying?

    Simple is best: salt, pepper, lemon slices inside the cavity, and fresh herbs like thyme or dill. For Asian-inspired: ginger, garlic, soy sauce, and sesame oil. Avoid heavy, wet marinades that prevent crisping.

    Can I cook pompano fillets instead of whole fish?

    Absolutely! Fillets cook faster – about 8-10 minutes total at 200°C (400°F), flipping halfway. Skin-on fillets will get crispy; skinless will be tender but less crispy.

    Conclusion

    Air frying pompano fish delivers restaurant-quality results with minimal effort and maximum health benefits. By patting dry, scoring the skin, and cooking at 200°C for 12-15 minutes total, you’ll achieve perfectly crispy skin and tender, flaky flesh every time. This method uses up to 90% less oil than traditional pan-frying while preserving the fish’s delicate, sweet flavour. Whether you’re cooking a whole pompano for a special dinner or quick fillets for a weeknight meal, the air fryer provides consistent, delicious results. Remember to always verify internal temperature with a thermometer for food safety, and enjoy your healthy, flavorful pompano with lemon wedges and your favourite sides.

  • How to Roast Chicken in an Air Fryer: Juicy, Golden Results Every Time

    How to Roast Chicken in an Air Fryer: Juicy, Golden Results Every Time

    What’s the best way to roast chicken in an air fryer?

    The best way to roast chicken in an air fryer is to cook smaller chickens (1.2kg) breast-down for 30 minutes at 180°C, then flip breast-up for another 15 minutes, and rest for 10 minutes before carving. This method ensures juicy meat throughout with beautifully golden, crispy skin.

    Testing

    After testing various approaches, I found that starting breast-down protects the delicate breast meat from overcooking while allowing the thighs and drumsticks to get a head start. Flipping halfway through lets the breast catch up and develop that coveted golden colour. The rest period is crucial for juice redistribution, resulting in moist, tender meat from first bite to last.

    Key Stats

    MetricValue
    Temperature180°C (356°F)
    Cook Time45 minutes (30 + 15)
    Rest Time10 minutes
    Chicken Size1.2kg (smaller birds work best)
    Servings3-4

    Step 1: Prepare Your Chicken

    How should you prepare the chicken for air fryer roasting?

    Step 2: Start Breast-Down for Even Cooking

    Why start with the chicken breast-side down?

    Step 3: Flip and Finish Breast-Up

    When and how should you flip the chicken, and what’s the second cooking phase?

    Step 4: Check Doneness and Rest

    How do you know when the chicken is done, and why is resting important?

    Common Mistakes to Avoid

    1. Not drying the skin – Results in steamed, pale skin instead of crispy golden skin
    2. Overcrowding the basket – Prevents proper air circulation for even cooking
    3. Flipping too early or late – Leads to uneven doneness between breast and thigh
    4. Skipping the rest – Results in dry meat as juices run out when cut
    5. Using too large a chicken – Larger birds may not cook through before burning

    Serving Suggestions

    • Serve with roasted vegetables cooked alongside or after
    • Make chicken salad with leftovers
    • Use carcass for homemade stock (breaks down easily for air fryer too!)
    • Perfect for Sunday dinner or meal prep
    • Great with gravy made from pan drippings (if any)

    Frequently Asked Questions

    Can I roast a larger chicken (1.5kg+) in the air fryer?

    Do I need to add oil or butter to the skin?

    How do I prevent the chicken from sticking to the basket?

    Can I cook vegetables underneath or around the chicken?

    What if my air fryer is small and won’t fit a whole chicken?

    Why the Breast-Down Then Breast-Up Method Works

    This technique leverages the air fryer’s strengths:

    • Even heat distribution – Circulating air cooks all sides simultaneously
    • Moisture control – Dry environment promotes crispiness without added fat
    • Temperature precision – Consistent 180°C throughout cooking
    • Self-basting effect – Juices flow downward as it cooks, naturally basting the lower side

    Starting breast-down uses this to our advantage: the thighs get cooked by both direct heat and natural basting from upper juices, while the breast is protected initially. Flipping lets the breast benefit from the same treatment while finishing the thighs.

    Compared to oven roasting (which can have hot spots and requires basting) or rotisserie (which not everyone has), the air fryer delivers restaurant-quality roast chicken with minimal fuss, no special equipment, and predictable results every time.

    Last updated: June 8th, 2026

  • Microwave Air Fryer Baked Potato Hack: Perfect Spuds in 15 Minutes

    Microwave Air Fryer Baked Potato Hack: Perfect Spuds in 15 Minutes

    Our How-to Guide for Perfect Spuds in 15 Minutes

    I spent last Tuesday staring at a rock-hard potato in my microwave, wondering if there had to be a better way. I’d tried the oven method before – forty minutes of waiting while my stomach growled. The microwave alone left me with a sad, spongy interior and skin that felt like damp cardboard. Then I remembered that air fryer sitting on my counter. What if I combined them? Microwave for speed, air fryer for texture. Two boring appliances make one beautiful potato.

    Have they invented the microwave air fryer combo machine yet?

    TL;DR / Key Takeaways

    • Microwave 5-7 minutes, then air fry at 200°C (400°F) for 8-15 minutes, delivering perfect baked potatoes.
    • Hasselback-style slicing (¾ depth) creates pockets for fillings and maximises crispy surface area.
    • Russet potatoes work best for fluffy interiors, while Yukon Golds hold shape better when sliced.
    • The method works because microwaves steam the interior while air fryers crisp the exterior.
    • Loading fillings before air frying melts cheese and crisps toppings without overcooking the potato

    What You Need Before Starting

    • Potatoes (Russet recommended for fluffiest results)
    • Sharp knife for hasselback slicing
    • Fillings of choice (cheddar, bacon, onions, etc.)
    • Microwave and air fryer

    Step 1 — Microwave for Internal Tenderness

    What to Do

    • Wash and dry potatoes thoroughly
    • Pierce each potato 3-4 times with a fork
    • Microwave on high for 5-7 minutes, depending on size (medium: 5-6 min, large: 7-8 min)
    • Potatoes should yield to gentle pressure but still feel firm when squeezed

    Why This Matters

    Microwaving jumpstarts the cooking process by exciting water molecules throughout the potato simultaneously, creating uniform steaming from within. This prevents the uneven cooking that leads to spongy interiors when microwaving alone, while avoiding the 40-minute oven wait.

    Common Mistakes to Avoid

    Over-microwaving: Leads to rubbery texture – stop when firm but yielding

    Skipping the pierce: Can cause potatoes to explode from steam buildup

    Not drying surface: Wet skin won’t crisp properly in an air fryer

    Step 2 — Hasselback Slice for Maximum Surface Area

    What to Do

    • Place the microwaved potato on the cutting board
    • Make thin slices about 3mm apart, cutting ¾ of the way through (don’t slice completely)
    • Think of creating an accordion effect while keeping the base intact

    Why This Matters

    The hasselback technique creates exponentially more surface area for crisping while forming little valleys that hold fillings in place as they melt. This transforms a simple baked potato into a loaded masterpiece without fillings falling out.

    Common Mistakes to Avoid

    Slicing too deeply: Fillings fall out during cooking

    Inconsistent spacing: Uneven cooking and presentation

    Using a dull knife: Increases risk of slipping and uneven cuts

    Step 3 — Stuff Those Slices

    What to Do

    • Gently separate slices to create pockets
    • Insert fillings: sharp cheddar, gruyere, or pepper jack work excellently
    • Add crispy bacon bits, pancetta, or chorizo for protein
    • Include finely chopped onions or chives between slices for freshness

    Why This Matters

    Loading fillings before air frying allows the heat to melt cheese perfectly and crisp toppings without overcooking the potato interior. The sliced technique creates natural containment valleys that hold melted fillings in place.

    Step 4 — Air Fry for Crispy Perfection

    What to Do

    • Preheat air fryer to 200°C (400°F)
    • Place stuffed potatoes in the basket, ensuring they don’t touch
    • Air fry for 8-15 minutes, depending on size and desired crispness
    • Cook until cheese is bubbling, bacon edges are crisp, and potato yields slightly when squeezed

    Why This Matters

    The air fryer’s rapid hot air circulation dehydrates the potato surface just enough to create shatteringly crisp skin while the already-cooked interior stays fluffy. At 200°C, the Maillard reaction occurs optimally for browning without burning.

    Step 5 — Serve and Enjoy

    What to Do

    • Remove potatoes carefully (they’ll be hot!)
    • Let rest 2 minutes for the fillings to set
    • Add final toppings: sour cream, Greek yoghurt, or extra chives
    • Slice open and enjoy the contrast of crispy outside and fluffy inside

    Why This Matters

    The resting period allows carryover cooking to finish while preventing burns from scalding-hot fillings. This final step ensures food-safe temperatures and optimal texture contrast.

    Potato Variety Guide

    Russet Potatoes

    High starch content creates the fluffiest interior ideal for baking. Thick skin crisps up beautifully in the air fryer, making them the classic choice for this method.

    Yukon Gold Potatoes

    Waxier texture holds shape better when sliced, reducing filling loss. Naturally buttery flavour means you might need less added fat. Slightly denser than Russets but still excellent results.

    Sweet Potatoes Require Adjustment

    Denser structure needs 2-3 additional microwave minutes. Higher sugar content risks burning – reduce air fryer temperature to 180°C (350°F) and monitor closely.

    Timing Reference by Size

    • Small potatoes (4-6 oz): 3-4 min microwave + 6-8 min air fry
    • Medium potatoes (8-10 oz): 5-6 min microwave + 8-10 min air fry
    • Large potatoes (12-16 oz): 7-8 min microwave + 12-15 min air fry
    • Multiple potatoes: Add 2-3 minutes per additional potato to the air fryer time

    The Science Behind the Method

    Microwaves penetrate food uniformly, exciting water molecules to generate internal steam that cooks the potato from the inside out in minutes. Meanwhile, the air fryer’s convection heating rapidly dehydrates the outer surface, triggering the Maillard reaction that creates complex flavour compounds and that irresistible crispy texture. Combining both methods optimises for speed (microwave) and texture (air fryer) simultaneously.

    Why This Beats Traditional Methods

    • Oven baking (40-60 min): Slow heat conduction from outside in often creates uneven doneness
    • Microwave only (5-10 min): Uneven heating produces spongy interiors and a rubbery texture
    • Air fryer only (35-45 min): Exterior cooks faster than interior, requiring careful monitoring
    • Microwave + Air Fryer (13-22 min): Best of both worlds – tender interior + crisp exterior

    Frequently Asked Questions

    Won’t microwaving first make the potato weird or rubbery?

    Can I add fillings before cooking, or will they burn?

    Do I need to flip the potatoes in the air fryer?

    What if I’m cooking for a crowd?

    Conclusion

    This microwave air fryer baked potato hack isn’t just a time-saver – it’s actually the optimal way to cook a potato when you factor in both time and texture. By leveraging each appliance’s strengths (microwave for speedy internal cooking, air fryer for exterior crisping), you get restaurant-quality results in less time than it takes to order takeout. The hasselback slicing technique transforms a simple side dish into a loaded masterpiece where every bite delivers the perfect contrast of crispy outside and fluffy, filling-stuffed inside. Next time you’re staring down a potato and sighing at the thought of forty minutes in the oven, remember: your microwave and air fryer are better together than apart.

    my airfryer logo

    The Hack

    Microwave air fryer baked potato hack is a cooking method that combines microwave pre-cooking with air fryer finishing to produce baked potatoes with fluffy interiors and crispy skins in under 22 minutes

    Key Information

    Microwaving potatoes for 5-7 minutes creates uniform internal tenderness without overcooking edges, according to food science principles.

    1. Air frying at 200°C (400°F) for 8-15 minutes produces shatteringly crisp skin while maintaining fluffy interiors.
    2. The hasselback slicing technique (cutting ¾ depth) increases surface area by approximately 300% compared to whole potatoes.
    3. Russet potatoes contain approximately 80% starch, making them ideal for fluffy baked interiors when cooked properly.
    4. Cooking time reduction: This method delivers baked potatoes in 13-22 minutes versus 40-60 minutes for traditional oven baking.

    Q&A

    What is the microwave air fryer baked potato hack?

    A cooking technique that uses microwave energy to jumpstart internal potato cooking, followed by air fryer convection to crisp the exterior, delivering perfectly textured baked potatoes in under 22 minutes.

    How does the microwave air fryer baked potato hack work?

    1. Microwave excitation of water molecules creates internal steam that uniformly cooks the potato interior.
    2. Hasselback slicing increases surface area and creates valleys for fillings
    3. Air fryer hot air circulation dehydrates the surface, triggering the Maillard reaction for crispiness
    4. Combined method optimises for both speed (microwave) and texture (air fryer)

    Why does the microwave air fryer baked potato hack matter?

    • Reason 1: Time savings of 60-80% compared to traditional oven baking — Data: 13-22 min vs 40-60 min
    • Reason 2: Superior texture contrast — Data: Fluffy interior + crispy exterior vs often uneven oven results
    • Reason 3: Versatility for fillings — Data: Hasselback technique holds melted cheese and toppings securely

    Microwave air fryer baked potato hack vs Traditional Oven Baking

    DimensionMicrowave Air Fryer HackTraditional Oven Baking
    Cooking Time13-22 minutes40-60 minutes
    Interior TextureUniformly fluffyCan be uneven (edge overdone, center underdone)
    Exterior CrispnessConsistently shatteringly crispVariable, often requires oil for crispness
    Energy EfficiencyHigher (focused heating)Lower (heating entire oven cavity)
    Best forQuick weeknight meals, 1-4 servingsLarge batches, hands-off cooking
  • Air Fryer Roast Potatoes

    Air Fryer Roast Potatoes

    Yes, you can make good roast potatoes in the air-fryer. These air fryer potatoes are crispy on the outside and fluffy in the middle, and they use a lot less fat than traditional roasties and cook in the air fryer. We guide you through making the air fryer roasties from start to finish.

    Potatoes

    It all starts with the potatoes. The ones used here are just Tesco’s brand, locally produced. Nothing special, just all-rounder potatoes. These particular ones are grown by Giles Edwards in Hereford. The variety is ‘Nectar’. But you can use whichever variety of potato you have to hand. They will all roast up nicely in the air-fryer.

    Peel

    Peel the potatoes. You don’t need to whittle down the potatoes to fries; remove most of the skin. A French peeler (Amazon) is easy to use, cheap to buy and dishwasher safe. It makes short work of peeling potatoes for roasting. At this point, you can also cut the potatoes. You want them all around the same size. No need to cut the smaller ones; the larger ones can be cut in half. Huge ones may need to be quartered.

    Par Boil

    To get the best roasties, you should parboil them. The parboiling will partially cook them to make the inside fluffy. You can also get a rough surface that better browns up in the air fryer. The parboil is not to thoroughly cook the potatoes, and you only want part cooking.

    Place the peeled and cut potatoes into a pan of cold water. Place a lid on the pan and heat the water. Boil for 5 minutes and check with a sharp knife. Poke the potato and if it resists the knife, give it another 5 minutes and check again. When the potato gives less resistance to the knife, they are parboiled. Don’t overcook, as they will mush up later.

    Drain and Shake

    With the potato par boiled, drain off the water.

    I like to keep the water for cooking other veg, reconstitute stuffing mix or making gravy from granules. As they roasties are often cooked as an accompaniment the water may be useful for some or all of the other cooking jobs.

    One of my tips

    Sprinkle salt on the drained potatoes and let some of the steam escape. Place the lid on the pan and shake the potatoes. This will rough up the outside of the parboiled potato to help with the browning. Start with a gentle shake and shake more if necessary. This will all depend on how much parboiling you did and the type of potato you used. This is why you check the part way of the boiling and the same for the shaking.

    Remove the pan lid and allow more steam to escape.

    Air Fry

    It is now time to air fry the roast potatoes. Add plenty of fat to the air fryer, two or 3 tablespoons for 12 roast potatoes. Pre-heating the air fryer is unnecessary, but you may have just removed the chicken, and it will already be hot. These potatoes don’t mind if you don’t pre-heat the air fryer. Add the potatoes into the air fryer basket with the oil and close the drawer. Set the temperature to 190°C or 375°F and time to 25 minutes.

    Don’t over crowd the air fryer basket with potatoes. The air needs to flow around and below them to pick up and atomise the oil. This will make them crispy. If potatoes are touching, move them so they are not to allow all of them to fully roast.

    don't overcrowd the potatoes in the air fryer
    Another of my air fryer tips

    After about 15 minutes, open the basket and turn each potato over. You should see a light and darker side to the now-developing roasties. After 10 minutes, they should be done. You can add more time if you think they need more but be aware of the other things you may be resting/cooking.

    Program

    If you have a ‘Roast’ button or roasting program feature, now is the time to use it. Don’t worry if you only have the air-fry option; this works perfectly for roasties.

    Serve

    When the 25 minutes is up, they can be ready to serve. Hot roast potatoes with a soft centre and crisp outside. All with less fat and less oven time. Cheaper to cook, and it doesn’t seem so bad to make roast potatoes midweek in the air-fryer.

    served air fryer roast potatoes

    Cooking Times

    Air Fryer Roast Potatoes Cooking Time

    The roast potatoes can take around 25 minutes at 190°C / 375°F in the air fryer. Check on them to turn them over after about 15 minutes. You will then see how well they are browning up.

    The parboiling takes about 10 minutes but check regularly with a knife to ensure you don’t thoroughly cook them. You want them to become less resistant to a knife.

    Leaving the potatoes longer with the lid off to stop steaming can help make them more crispy in the air fryer.

    Larger potatoes take more parboiling, and keeping them a similar size ensures they all cook at the same rate.

  • Air-fryer Cooking Times

    Air-fryer Cooking Times

    Compared to a conventional fan oven and a deep-fat fryer for frozen chips.

    Comparisons

    Comparing cooking times between the air fryer and a conventional oven can help you adapt the oven-only instructions to work in the air fryer. While manufacturers of the packaged food we buy are catching on to the air fryer, some are slow to adapt. This can be an issue when you want to air fry some packaged food that doesn’t mention air fryer times on the packaging.

    Less time.

    The comparison for frozen potato chips uses a shorter cooking time in the air fryer, but you can also reduce the temperature by 50°F (10°C) and still get excellent results. The air fryer cooks food extra crispy and dialling down the temperature and the time can give you outstanding results. You can cook longer if needed but can’t uncook the overcooked food.

    Check the basket regularly. Particularly with fries that need a regular basket shake, you can check the colour of the food. This can sometimes be an indicator, but the internal temperature defines when it’s properly cooked.

    Crinkle Chips

    Iceland, frozen crinkle chips are listed as cooking in a conventional, pre-heated fan oven at 200°C for 18 to 20 minutes.

    In the air-fryer, this time is reduced to 16 to 18 minutes at 200°C with a shake halfway through.

    Both times are based on a quarter of a bag.

    A conventional oven can cook a whole bag simultaneously as a quarter of a bag of chips. A medium-sized air fryer could be overcrowded and take longer to cook than a quarter of a bag, and it will need more shakes during the cooking, and the smaller capacity of the air fryer will need more time for a more significant portion of chips.

    Deep fat fryer

    As a fair comparison, the deep fat fryer is also listed on the frozen crinkle chips cooking time.

    175°C for just 3-4 minutes. You have the oil pre-heating time to add to the overall time, but don’t put the chips in until the deep fat fryer has reached the 175°C.

    You don’t need to add fat to cook the frozen chips, so there is no accurate comparison.

    Cooking temperature

    I regularly reduce the listed cooking temperature, even if this time is shown explicitly for an air fryer. Cooking at 50°F (10°C) less can help to save costs. The quicker heat up time, the lower electricity required to meet the lower temperature and sustain it all help. Only by a small amount, but it begins to add up each time. You still get crispy food, and there is less chance of burning. If reducing the temperature didn’t provide good results, there is no reason to cook it a bit longer or crank the temperature by 10°C/50°F for the final few minutes.

    Pre-heat

    For frozen potato chips, crinkle, straight, criss-cross, and waffles. These are safe to put in the air fryer from the cold. Use the energy the air-fryer takes to get to its set temperature to cook your food. This head-start on the cooking will mean the overall cooking time will be less. Less cooking time, less temperature, and less warm-up time can all help reduce costs. Don’t be afraid to use the pre-heat time to cook your food if you want to reduce your cooking costs.

    Foods such as frozen fries will respond well to using the pre-heat for cooking but bacon would benefit from pre-heating the air fryer before adding the food. Bacon is more sensitive to the air fryer cooking and a pre-heated bottom plate will help the underside cook more evenly.

  • Cooking Pork Belly slices in the Airfryer

    Cooking Pork Belly slices in the Airfryer

    Can you cook pork belly slices in the air fryer?
    How long do you cook pork belly slices in the air fryer?
    And at what temperature do you cook pork belly slices in the air fryer?

    We have the answers to your questions from our time cooking tasty pork belly slices in the air fryer.

    Pork Belly Slices

    Thick slices of the pork belly with plenty of fat to render down and make it lovely and crispy on the outside. Pork bellies are relatively cheap meat but with very high-fat content, and the flavour is in the fat, and the pork bellies are bursting with flavour.

    A BBQ Favourite

    But we decided to cook our pork belly slices in the air fryer. It is winter, and there is no BBQ to cook on; the air fryer is more economical than the conventional oven. Oh, and the air fryer is great for making food crispy.

    Pick your slices

    The variation in the fat level on the pork belly slices is the deciding factor as to how long to cook them for. It is best to try to pick the belly slices that have a similar amount of fat to each other, enabling them to be all cooked for the same amount of time.

    Picking pork bellies with less fat will need less time, maybe half the time we used for the pork belly slices shown below.

    pork belly slices in the airfryer

    That’s not a problem; you can interrupt the cooking by removing the air fryer basket to check its appearance. Add more time or take them out.

    Cooking

    The meat of the pork belly slices doesn’t take very long to cook, and the fat takes time. The fat renders into the meat as it cooks to keep it moist.

    Pork belly slices tip: Cook at a lower temperature than in an oven.

    The cooking time for the pork belly slices above was 1 hour at 160°C (320°F).

    Less fatty

    If your pork belly slices have less fat than ours, consider dropping the time by half. You can check how done they are and cook more, but it is impossible to cook less if overcooked.

    Pork belly slices tip: They will look very brown but may still need more cooking. Don’t panic if they look dark. You can take one out and cut the end off to check how well it’s done.

    Reduce the time if you like your pork belly slices less well done and still quite fatty.

    If you like your pork bellies done more, add more time.

    The 160°C/320°F works well to render the fat while keeping the meat tender.

    AirFryer Pork Belly Slices Cooking Time:

    airfryer pork belly slices cooking time
    air fried succulent pork belly slices
    Succulent air-fried pork belly slices
  • Air Fryer Spam Fritters

    Air Fryer Spam Fritters

    Well, it’s a cheat for spam fritters in the air fryer rather than the well-loved from-scratch batter version. But it can still be a good second choice when time is limited.

    Cheat time

    The Iceland frozen food chain has the Hormel frozen ready battered spam fritters. This is the cheat. They have already been made and frozen for convenience, and this cheat cuts out all the work of not just making the batter but also sticking to the spam and not making a mess of the air fryer. Try the frozen variety if you want to save time and still serve spam fritters in the air fryer.

    Cooking Time

    With the air fryer’s super quick and economical cooking times, the timing differs from that of a conventional oven. While the food packaging plays catch-up with the air fryer revolution, most of the time, temperature cooking instructions are still for a fan oven.

    The fan or conventional oven times and temperatures are too hot and too long for an air fryer. We have tested the time and temperature for Iceland’s frozen (from frozen) air fryer settings.

    Cooking time: 10 minutes at 180°C (350°F) for the Hormel Spam fritters from frozen.

    Crispy

    The air fryer is great for making crispy food.

    extra crispy spam fritters airfryer

    These Spam fritters benefit from a super crispy air fryer-style cooking of the batter. Even frozen, they crisp up nicely on the outside with hot spam in the middle.

    Serve

    How to serve spam fritters?

    The packaging makes a good suggestion. Peas and mashed potato. Not a bad idea. But the air fryer is quick. Much quicker than it takes to boil and mash the potatoes, and it’s only a quick lunch for us.

    Our take? Spam fritter sandwiches. No more double carbs than mashed potato, but so much quicker to serve.

    Add cheese slices to the spam for the last few minutes of cooking to melt it nicely for that extra calcium we all need.

    cooked spam fritters in the air fryer served with ketchup

    Pair with Ketchup or Brown sauce; that’s your choice.

    air fryer spam fritters in bread with cheese

    Our Verdict

    These were very quick to make.
    The batter came out extra crunchy.

    On a scale of actual, from-scratch spam fritters that get a 10, this frozen variety gets a 7. A good attempt, but the time trade-off shows. But this is not because of the batter, but rather the spam, and it seems to have less flavour and is not as salty as the real stuff from the can.

    Air Fryer SPAM fritter cooking time
  • AirFryer Cooking Times for: Breaded Cod Fillets

    AirFryer Cooking Times for: Breaded Cod Fillets

    and Criss Cross Fries (from frozen)

    The Air Fryers tend to heat up more quickly, cook more quickly and need less heat setting to cook just as well as a conventional oven.

    Cooking Instructions

    The cooking instructions on the label will often specify an oven and often a reduced time or temperature for a fan oven. The air fryer instructions are not very common, and following the packaging label instructions provided as suitable for a conventional oven won’t be right for an air fryer.

    Quicker Cooking

    With quicker cooking (than even a fan oven) air fryer, you can reduce the time to cook the food. It can also be helpful to reduce the temperature too.

    Cheaper Cooking

    This helps save money on electricity because the air fryer doesn’t need to get so hot to start your cooking and doesn’t need to stay on for as long to cook your food thoroughly. There is also less wasted heat because the air fryer is better insulated and has less space to heat unnecessarily.

    Cooking Times

    With no cooking times on the label dedicated to an air fryer, it can be an unknown quantity, and first-time users can quickly overcook the food.

    For example, the Frozen Lidl 4 Breaded Cod Fillets take about 25 minutes to cook at 200°C based on two fillets.

    This is too long and far too hot for a typical air fryer to get a crispy breaded coating and piping hot, flaky code fillets from frozen.

    The actual Air Fryer cooking time was 16 minutes with the temperature set to 180°C. This cooked two breaded fillets with a nice crisp coating and piping hot yet moist cod in the centre—just perfect and less time and temperature than suggested on the packaging.

    Air Fryer Timing

    I served the Lidl fish with some Iceland Criss Cross Fries going down. This brings another timing calculation to get both parts of the air fryer meal perfectly cooked and served simultaneously.

    Iceland Criss Cross Fries

    The 800g Criss Cross Fries packaging is 200°C at 15-20 minutes for a fan oven.

    This is far too hot and long for an air fryer to get crispy and adequately cooked crisscross fries from frozen.

    You can drop the temperature of the air fryer to 180°C when the conventional or fan oven states to cook at 200°C. The 180°C is also suitable for the fish with a single basket air fryer.

    You will also need to reduce the time from the suggested 15-20 minutes to a more precise 8 minutes. This will stop the criss-cross fries from getting too hard and overcooked.

    Bringing it all together

    With the timings in mind, it’s just a case of starting the fish off for 8 minutes at 180°C.

    Preheat the air fryer or add the fish and allow it to heat up. The preheat time is short and doesn’t noticeably affect the cooking time.

    Ignore the turn food warnings, as you can use the time you are adding the criss-cross fries also to turn the fish. This means you don’t unnecessarily remove the basket from the air fryer.

    With the air fryer 8 minutes complete, you can open the basket, flip over each of the two breaded fish portions and add the criss-cross fries in the space.

    Set the timer to another 8 minutes and keep the temperature at 180°C. Wait for the cooking to complete and ignore the turn food advice. The fish has already been turned, and the criss-cross fries don’t need it.

    Food Cooked

    The air fryer food will be cooked.

    It took 8 minutes to cook the frozen criss-cross fries and 16 minutes to cook the frozen breaded cod fillets.

    We gave the fish an 8-minute head start, and I was turning them after 8 minutes and adding the criss-cross fries simultaneously. Another 8 minutes means the fish got 16 minutes, and the fries got 8 minutes.

    You can check if the food is piping hot; if not, you can add more time. For our 5.7L single basket air fryer, both parts of the meal were cooked perfectly after the times above.

    Just plate up and serve (with mushy peas and lashings of freshly ground cracked black pepper)

    Tips:

    Don’t overcrowd the basket as this will increase cooking time and need more food turning.

    A larger air fryer makes the cooking easier to manage by reducing overcrowding and the need to shake the basket as frequently.

    Lower the temperature from the conventional oven instructions. 200°C can safely be changed to 180°C if you check the food is piping hot before serving, and this will keep the food crispy without drying it out excessively.

    Cut the time back. You can add more time by setting the timer again, but you can’t undo an overbaked dinner. Check the food is piping hot before serving.

    Iceland Criss Cross fries from frozen and a preheated air fryer took just 8 minutes at 180°C.

    Lidl breaded cod fillets (2) from frozen to just 16 minutes at 180°C

    Calories

    There is no added fat for cooking this meal in an air fryer, so the calories are the same as for a conventional oven and correct on the packaging.

    Each Frozen Lidl breaded cod fillet is listed on the packaging as having 248kcal/1041kJ per fillet.

    A 100g portion of the Iceland Criss Cross Fries is listed as having 259kcal / 1085kJ

    Cooking Times

    criss cross fries airfryer cooking time
    Criss Cross Fries in the AirFryer Cooking Time
    Airfryer breaded cod fillet cooking time
    Frozen Breaded Cod Fillets AirFryer Cooking Time